Teacher Appreciation gifts
Well, I realized from reading my Facebook news feed, that teacher appreciation week was coming. (Yes. I spend too much time on Facebook looking at ideas that I could be doing instead of actually making things. Ha!)
I decided that I was going to make fabric lanyards for the teachers at my son's preschool. I Google searched for ideas and I came across a lovely tutorial that had a smart way to make it more finished looking. It comes from the website Ellison Lane: Modern Sewing and Design by Jennifer Mathis.
Most lanyards that I had seen elsewhere made a simple strip and then placed it through a swivel hook or some other attachment and then you would proceed to cover up the ugly loose ends. Jennifer has an ingenious idea of sewing the ends together before sewing the sides with the swivel hook on it so that there is less of a bothersome ugly portion that you would later have to cover with another piece of fabric or adornment.
I had some fabric left over from a failed sewing project. I am thinking seriously that I've had this fabric for over 12 years. I loved the swirly blue and purple design and just never could get myself to get rid of it.
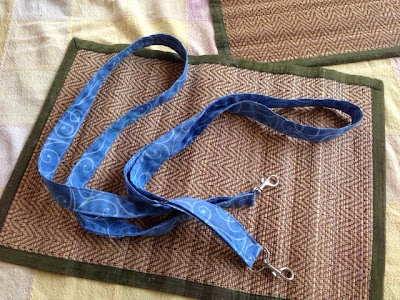
The fabric is perfect for my son's preschool teachers. I hope they like them. As I have, as usual, limited time, I just chose to make a single fabric lanyard with a strip that was 2 1/2 inches wide by 40 inches long. I also had 1 inch swivel hooks from when I made this lovely bag by U Handbags. So I didn't have to purchase anything else for this project. Yay! I am actually clearing my craft closet out! Ok... It's a small victory, but sometimes you have to take them when you can. Right?
What should have been a quick and easy project was not. My sewing machine decided to eat up thread and I spent a good amount of time trying to pull out the clump of thread under my sewing machine foot. Ahh... It always goes this way when you are short on time. Doesn't it?
Here are the finished lanyards. I am pleased with them. I realized after I cut the fabric that I should have cut the strips to 3 inches so that I could fold the fabric more and not have to worry about sewing up the sides so carefully. The original tutorial had smaller swivel hooks.
I wanted to personalize them with the schools logo and the teachers' names, but I ran out of time. There's always next year.
Link to original tutorial:
http://ellisonlane.com/2013/09/double-sided-lanyard-tutorial-back-school-ellison-lane.html


Comments
Post a Comment